Tuesday, April 30, 2019

Jellyfish Midori-Style Journal

I rarely make things for myself so this is a treat! After being introduced to the Midori style journal by a swap partner I decided to spoil myself and make one for me too! I pulled out some fabric I've been hoarding and here it is:

I love this jellyfish fabric someone gave me but I only had a little piece to work with. I knew when I got it that I would have to find something extra special to make with it :) And I love how well it pairs with the green fabric I used on the spine.

I bought some rainbow cord but wasn't happy with having one layer (that didn't show off all the colors) so I braided the outside cording. I also added this neat button from my stash:


I made an extra pocket for the inside front cover that fits my small calendar perfectly:


I used an extra strip of green fabric on both sides in part because it's pretty but mostly because I miss judged the size and wanted more fabric on the inside. Here it is showing off the first notebook signature made from an old calendar:


Other side of the signature and another one I made:


I really spoiled myself because that's a calendar page I've been holding onto for a while, I love that picture! And it's fitting to be in a jellyfish journal :) 

Last signature and he back cover:


Thanks for looking!

Midori Style Journal and a Pocket Insert

I have been obsessing over this new (to me) journal idea since I was partnered with someone in a swap in February. It's a Midori or Travelers notebook/journal and the basic idea is that all the notebook signatures are replaceable. So it's extra customizable, long lasting, and addictive! I'm going to share one regular sized journal I made along with a pocket insert. This is one of the first three journals in this style that I've made and one of the largest. The ones I've made since are all smaller "pocket" sized (and I'll share those later).

When I started making it I was going back and forth between it and two other small ones to see what I did and didn't like along with what did and didn't work. I borrowed a lot of the design/structure from the fabric covered art journal I posted about in February.

I was partnered with someone that likes nature, leaves, and green/forest colors so I wanted to incorporate that into the journal. (It was a color themed swap so I paid extra attention to forest colors).  I used this dark green speckled fabric as the background and filled it with fallen leaves. I also found a wood button made from a tree branch with bark still attached that I added to the outside elastic cord.

Front and back:


I made the leaves similarly to the way TM patches are made by hand stitching the raw edge to the other side. I used batting in the middle to give it more weight and machine stitched the veins with a variegated thread. Closeups:


Here's the cover before I added the elastic cords:


Open cover before and after cords were added: 


I used a button on the inside to keep the cord on the outside secure. I also included some autumn leaves fabric to keep the leaves theme going on the inside. 

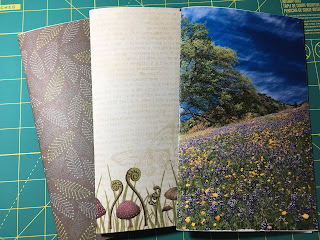
Then I made some paper signatures to use inside the journal. I used a combination of scrapbook paper and old calendars. One is shown flat/open and the other three are closed.


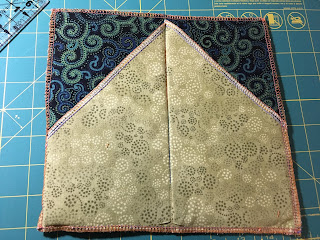
Then later for the same person (but in a different swap) I made her a pocket insert for her "travel" size journal. I used greens that I hadn't used before and some other complimentary fabrics. This thing was a pain to make and it seemed like everytime I turned around I had made another mistake. But in the end it did it's job and I was satisfied enough to send it on it's way. I tried to make a variety of pocket types to give her options.

Inside pockets laid flat (this side was supposed to be the outside but it wouldn't fold that way!):


Outside pockets laid flat:


And folded:


I enjoyed serging all the edges for this but I haven't attempted making more pockets since! Next time I make one I think I'll try something different to stabilize it. Maybe cardstock or denim? 

Sunday, April 14, 2019

March ATCs

I made some ATCs (Artist trading Cards) for a swap last month, here they are :)

"Sew Scrappy" made from watercolor test scraps, an old measuring tape, and crochet thread on shimmery green cardstock.


"Herbs" using pieces from a vintage cookbook. 


"Tea Cozy" using a tea tag, crochet thread, sticker, and a cutout from a Pusheen calendar.


"Baby Blanket" inspired by the blanket I made last month using scraps from when I made it.


 "Faded", a found poem from a page from "The Hound of the Baskervilles" by Sir Arthur Conan Doyle. I used a piece of the watercolor background I made for the positive affirmation art and the poem is from one page that I cut and folded.


Saturday, April 13, 2019

Positive Affirmations

I joined a "Positive Affirmations" swap before stopping to realize I wasn't very familiar with the idea of positive affirmations. I'm happy I joined because I learned some nice things in the process.

My swap partner and I live in different countries so we agreed to swap things that wouldn't cost a fortune to mail. I used two of her favorite affirmations to make some wall hangings.

"Make art every day" made with cardstock, ribbon, stamps & ink, and a gold paint pen.


I used letters from her name to stamp a background and make it a little more personal.


"Art has no rules" Made with a watercolor background, blue paint pen, string, and I think I used a blue sharpie for the edges of the hexagons.


I wanted each word to have a different background so I painted a few different ones on the same paper. 

I forgot to take a picture before I started cutting it up but I did remember to document how I made the spiral. Here are the pictures I have:


Wednesday, April 10, 2019

Hobbit Meal Times, an inchie book


 I made this for a swap a few months ago. each page is an inchie (a one-inch square) with picture on the front and time on the back. The front cover of the book is a hobbit door and the back cover is the title page.


Here is a picture of all the mealtimes and a bonus "po-ta-toes" for the end:


All the times:


What it looked like assembled:


It was a fun challenge learning to write like a hobbit! I found the mealtimes by searching online and there were a few discrepancies I found so I just went with what most people said. I figure everyone eats at different times depending on their household and these are the times this hobbit household eats! Same goes for the handwriting, even though we are all taught the same in school everyone develops their own style. It was fun to make and the person I gave it to was happy and in the end that's all that matters :)