Thursday, January 2, 2020

December 2019 ATCs

Here are my December ATCs. All made for swapping after the news that our favorite craft site was going to close down. It was bittersweet and it led to the creation of our new crafty home: https://forum.lettucecraft.com/


"Fate" made from one of my first masterboard backgrounds, some watch face pieces, and a quote from a Sherlock Holmes book. It reads “Now is the dramatic moment of fate"


"Trust" on masterboard background, metal embellishments, and ephemera.


"Shine" made from masterboard pieces from myself and others. Quote reads "Let nothing dim the light that shines from within by Maya Angelou.


"Kind Advice" quote reads “Be giving, forgiving, compassionate, and loving”. Made with masterboard, puffy stickers, and postage stamp


“Happy Hexagons” #2 of infinity


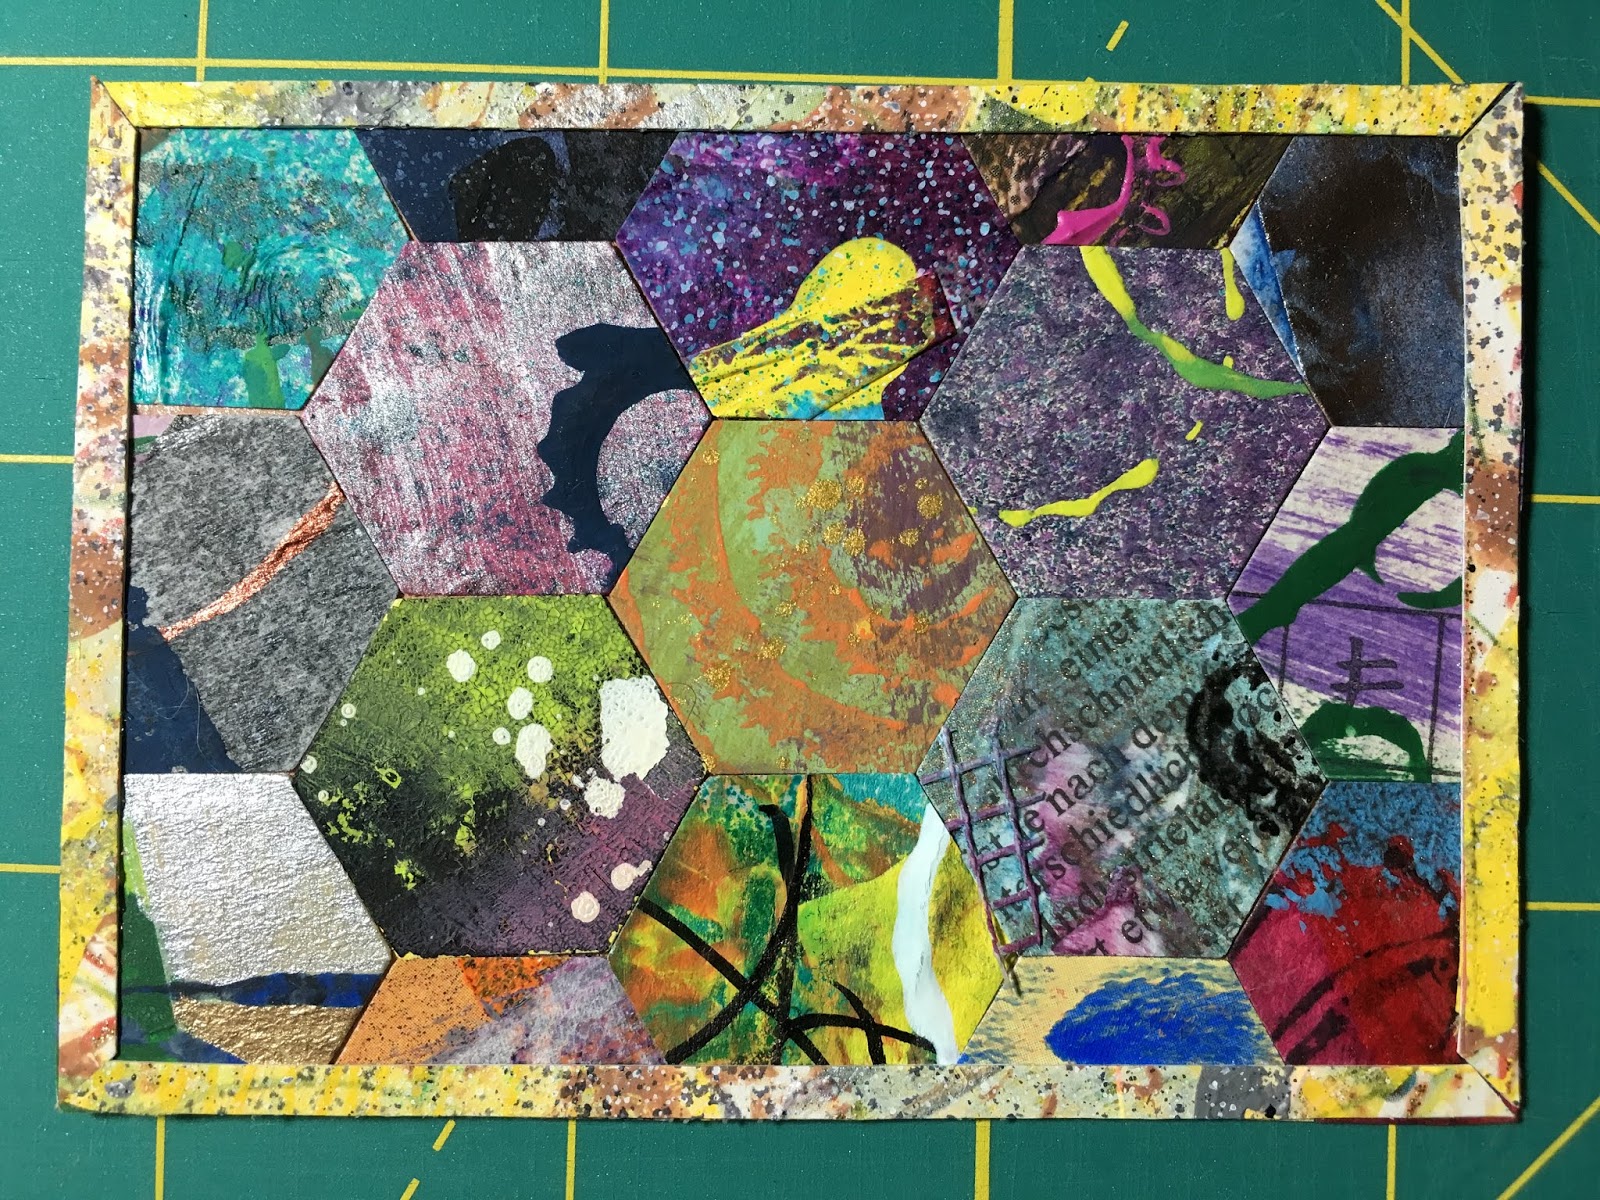
“Happy Hexagons” #3 of infinity 

I love making these “Happy Hexagon” cards and started numbering them out of infinity so I never have to stop. Made from masterboard pieces from myself and others.

Thanks for looking!!!


Wednesday, January 1, 2020

August 2019 ATCs

A little late in posting, but here are the ATCs I made in August

"Rainbow Party" made with masterboard background, postage stamp, and gold stickers.


"May this be the Day" made with masterboard background and pieces, metal embellishments, and tea tag quote.


"Love Letters" made with tiny junk mail envelopes, masterboard pieces, and a postage stamp on a scrapbook paper background. Some of the envelopes contain tiny love letters. I had fun making up cute and cheesy notes.


Bonus picture: extra tiny envelopes.


Monday, December 16, 2019

Pocket Sized Travelers Journals

Here are some pictures of Pocket sized travelers journals that I have made in the past:


This is one of the first little ones I've made and I use it for myself. The button has a little heart on it and it just makes me happy:


Here are four that I made as additional gifts for the director and assistant director from "Pack of Lies":


And one I made for a swap:


Thanks for looking! You can find y tutorial for how I make these here: https://kaisa-reinikka.blogspot.com/2019/06/pocket-sized-travelers-journal-tutorial.html


Tuesday, December 10, 2019

Masterboards

I'm addicted to masterboards! I first learned about them from some swap friends and this link: https://www.craftster.org/forum/index.php?topic=457700.0 but there are a lot of other examples and tutorials out there. A masterboard is basically a layered mess intended to be the background for future projects. I made a bunch using paper bags, envelopes, scrapbook paper, and cardstock as the base then added paint, stamping, sharpies, torn book pages, tissue paper, and so on. I haven't been very consistent with photographing my masterboards but here are the pictures I have saved to my computer.

The inside of a security envelope (usually mailed with bills) has a nice background to start:


Tissue paper layered with stickers and paint on top of a paper bag:


Some paper bags layered with mostly paint using objects found around the house as stamps:


Sometimes I only add a little:


And sometimes I add a lot (layers of newspaper, book pages, spray ink, and more!):


And here are a few that I made with scrapbook paper as the base:


Most of them look like a great big mess but once they are cut smaller it easier to see their potential! A  lot of these have since been cut into smaller sections and sent to other people around the world to use for their projects. 


Monday, December 9, 2019

Rainy Day Umbrella Bag

I made this bag around the same time as the Retro Phone Bag ( https://kaisa-reinikka.blogspot.com/2019/08/retro-phone-applique-bag.html ). It was originally going to be my cast party gift for Pack of Lies but I had added the appliques after sewing the outside of the bag together and they weren't staying stuck so I had to sew them on by hand because I couldn't reach them all with my machine. It ended up taking so long that I made the other bag before I finished this one. I actually fell in love with the design after spending so much time working on it that I ended up finishing it for myself and I have been using it lately. It doesn't have a pocket but I did give it a snap closure. I made the umbrella and raindrop patterns myself and am quite happy with the umbrella design. 


Closeup detail pictures:


Sunday, December 8, 2019

Rainbow Tote Bag (WARNING, lots of pictures)

I made this bag back in August for a rainbow themed swap. It was tons of fun to make even if it did take a little longer than the swap requirements :) 

Either side could be the front, but this is the side I picked for front:


Back:


Inside pocket, snap, and stitching detail (rainbow thread!):


And here are my planning and in-progress pictures and overly worded descriptions:

The plan, 12 color blocks with one each of ROYGBV (I cut out indigo, sorry ;) ) and one block to go between each with their common neighbor mixed in. Example is the block between Red and Yellow is Red, Yellow, and Orange.


Each block started as a 7" square but they shrunk throughout the process. Here they are on their own 

Front side blocks:

Red / Red, Orange, Yellow / Yellow:


 Purple, Red, Orange / Orange / Orange, Yellow, Green:


 Back side blocks:

Yellow, Green, Blue / Blue / Blue, Purple, Red:


Green / Green, Blue, Purple / Purple:


And some more in-progress pictures

Starting to add the grey border:


Closeup (it's actually grey with shimmery gold):


Each side finished and ready for bottom and lining:


I love how the border makes each section "pop" instead of having them bleed together.

I used mostly fabric from my stash and used a heavier linen type fabric for the bottom and lining. The blocks were made using a modified version of this tutorial ( https://quiltingisstillmypassion.blogspot.com/2007/07/mile-minute-blocks-photo-tutorial.html )Thanks for looking!