Sunday, December 8, 2019

Teesha Moore Inspired Patch Doll

This past Summer I was in a swap where we were charged with making a doll of our partners. Why on earth I joined I'm still not sure! I would never consider myself a doll-maker.... but I jumped in at the last minute thinking I would make a fancy paper doll but then had second thoughts. After many sketches, templates, research, hair pulling, research, overwhelming thoughts of "why did I join this swap??!?", more sketches, more research, a hurried purchase of a blank doll form on etsy, and finally a flash of inspiration! I made this:


She is a TM style patchwork doll. I drafted a simple pattern for the head, body, arms, and legs. Went through my stash of fabric and picked out all the ones that I thought represented my partner (her love of nature and writing stood out the most). Then matched the fabrics up and decided where each one would go and got to cutting.

I was originally going to make her one-sided but then I decided to double up on the pieces because I wanted the back side fabrics to be pretty too! So I made two of everything and stitched them back-to-back before putting the doll together (except the I put part of the neck into the body before stitching it together). Here's her back:


The edge of the head is done opposite to all the other patches; the raw edge is turned to the back instead of the front to give her a nicer/more polished look. Her face was a challenge! I started and re-started a few times... but I think I finally gave her some nice eyes and mouth :)


I gave her some button joints:


 And then I got to work on the HAIR, so... much... hair...!!!


When she was complete I had a little extra time and made her a mini travelers journal as well :)


I used two little TM patches from my stash. I cut a rectangle of fabric big enough to hold them together and be the lining for the inside (and hide the backside of the patches). The pages are made from envelopes rescued from the recycling 


And finally, here she is with her book


Thanks for looking! 

Monday, August 12, 2019

July ATCs

Here are the five ATCs I made in July. All using pieces of masterboard either made by myself or from the ones I received through swapping.

"Happy Hexagons" made with masterboard and scrapbook paper pieces.

"Good or Great" made with masterboard background, ribbon, and quote from a pop open card.

 "Make Today Count" using masterboards and glittery stickers.

"Bloom and Grow" made on masterboard background with stickers, stamp and torn envelope, and dimensional tag.

 "War of the Worlds Alternate Caption" made on masterboard background with illustration cut from an astronomy book and hand lettered caption bubbles.

Monday, August 5, 2019

Retro Phone Applique Bag

A few months ago I was in the play "Pack of Lies" by Hugh Whitemore. For every show I've been involved with for this theater company (so far) we do a white elephant style gift exchange at the cast party. The idea is to gift something that reminds you of the show and/or the experience of working on the show. Well the telephone rings a lot in the show, my character carries a phone off, and I made a few bags for use as props in the show. We also had a black & white monochromatic set, costumes, props, etc so I wanted to include those ideas in my gift. I love using the opportunity to make something and so far all the gifts I've done for cast parties have been hand-made.

Here is what I made for this show:


I used some soft wool and green linen for the bag itself and made a grey and black telephone applique to go on the front. I also lined the bag with the green linen. I used fusible webbing to attach the phone then machine stitched around the edges for extra durability. Then I added buttons. For one, buttons are easier to add than little fabric circles would be. And second, they add some extra personality.

I wanted to make the phone black & white to represent the colors of the show but I didn't want it to get lost in the background and I wanted to make a cheerful bag since the show itself was a adowner... I made the pattern for the bag and phone applique. I really wanted to showcase the wool I chose but also wanted it to be durable and I wasn't sure how the bottom would hold up so I decided to use a strip of the linen at the bottom and I am really happy with how it turned out. I love how the telephone looks like it's sitting on a table. 

Here's a picture with the flash on so you can see the glittery fabric:


And a closeup of the phone:


And here it is hanging up (I had a hard time getting a good picture this way):


I'm happy with how it turned out! The director of our show ended up getting it and she seemed to like it too. Thanks for looking!

Sunday, July 28, 2019

June ATCs

Usually I give away or trade all my ATCs but in June I made two that I kept for myself (at least for now). Here they are:

"ATC Address" made with masterboard background, post marked stamp, and scrapbook paper. I made this one to represent a swap I'm hosting.

"Follow Your Dreams" Made on a masterboard background with dimensional stickers, scrapbook tag, and a quote from a "pop open" card. I fell in love with this one and since I didn't have anyone in mind when I made it I decided to hold onto it. I may give it away in the future but for now I keep it on my craft table and it makes me happy. 

Now onto the cards I've sent into the world!

"Beauty in Nature" made on a masterboard background with dimensional flower sticker, tea tag, childrens book images, and metallic star brads. The quote on the tea tag is from Vincent Van Gogh "If you truly love nature, you will find beauty everywhere." Since I can't help but think of "The Starry Night"painting when I see his name I was compelled to add some stars in a little swirl. 

"Dancing Cauliflower" made on a masterboard background with cutout from a macaroni and cheese box. Just a bit of fun. We recently started buying this kind and the picture on the box just looks like a cauliflower in a loincloth to me. 

"Grey with a 'Pop' of Color" watercolor background and dimensional letters, card bordered in silver. I claimed someone with the theme "greyscale with a pop of color" and couldn't resist sending this as an extra.

"Pathless Woods" on masterboard background with mushroom stamp, tea tag, a masterboard scrap, and sticker embellishments.

 "June" on masterboard background with dimensional stickers and letter stickers.

 "Plant Kindness" on masterboard background with masterboard hearts, tea tags, and metal embellishment (from an old earring).

"Watercolor Pumpkin" watercolor background in autumn colors, watercolor pumpkin with metallic paint, gold stickers, and bordered in ore metallic paint.

Sunday, June 23, 2019

April ATCs

A little late in sharing these, but here are some of the ATCs I traded in April


Set of four seasons cards using similar methods/style. The squares came from a strip of magazine paper but I can't remember where I got them from, they have been in my stash for a few years.


"Winter" using scrapbook paper and stickers.


"Spring" using scrapbook paper, and raindrop stickers.


"Summer" using greeting card background, magazine, and metal butterfly embellishment.


"Harvest" background is from a paint inspiration book, tag is from a recipe card, and wooded leaf button.


"Seahorse Royalty" on watercolor background (another piece from the positive affirmation art) with sticker, cutout from a Spanish children's book, and dictionary definition. 


 "Yellow Paper Mystery" using a masterboard background, measuring tape, key, and a cutout from "The Hound of the Baskervilles" by Sir Arthur Conan Doyle.


"Thorns" using a masterboard background, tea tags, nail art tape, and washi tape. 


"Time" on a masterboard background with tea tag, watch face, and gold stickers. 


Saturday, June 22, 2019

Pocket Sized Travelers Journal - Tutorial

This tutorial is for a pocket sized travelers journal. Similar to the midor-style journals I posted most recently, but smaller. This is my method, please feel free to copy and/or modify for making your own.


For the pocket size I use notebooks that are 5" x 3 1/2" (I bought a pack on Amazon). This journal will fit four nicely.


Supplies needed:
~ Cardstock cut to 7 3/4" x 5 1/4"
~ Fabric for spine cut to 2 1/2" x 6"
~ Fabric for front and back cut to 5 1/2" x 6" (cut two)
~ Mini eyelets. For this tutorial I use 6
~ Elastic cord
~ Optional button
~ Surger (or modify for a sewing machine)
~ Thread
~ Iron (optional)

Here we go! 

Step 1: 
Fold cardstock twice at 3 5/8" in from each side


This is what I found works best for the notebooks I use, you can see they fit perfectly in between the folds:


Step 2: 
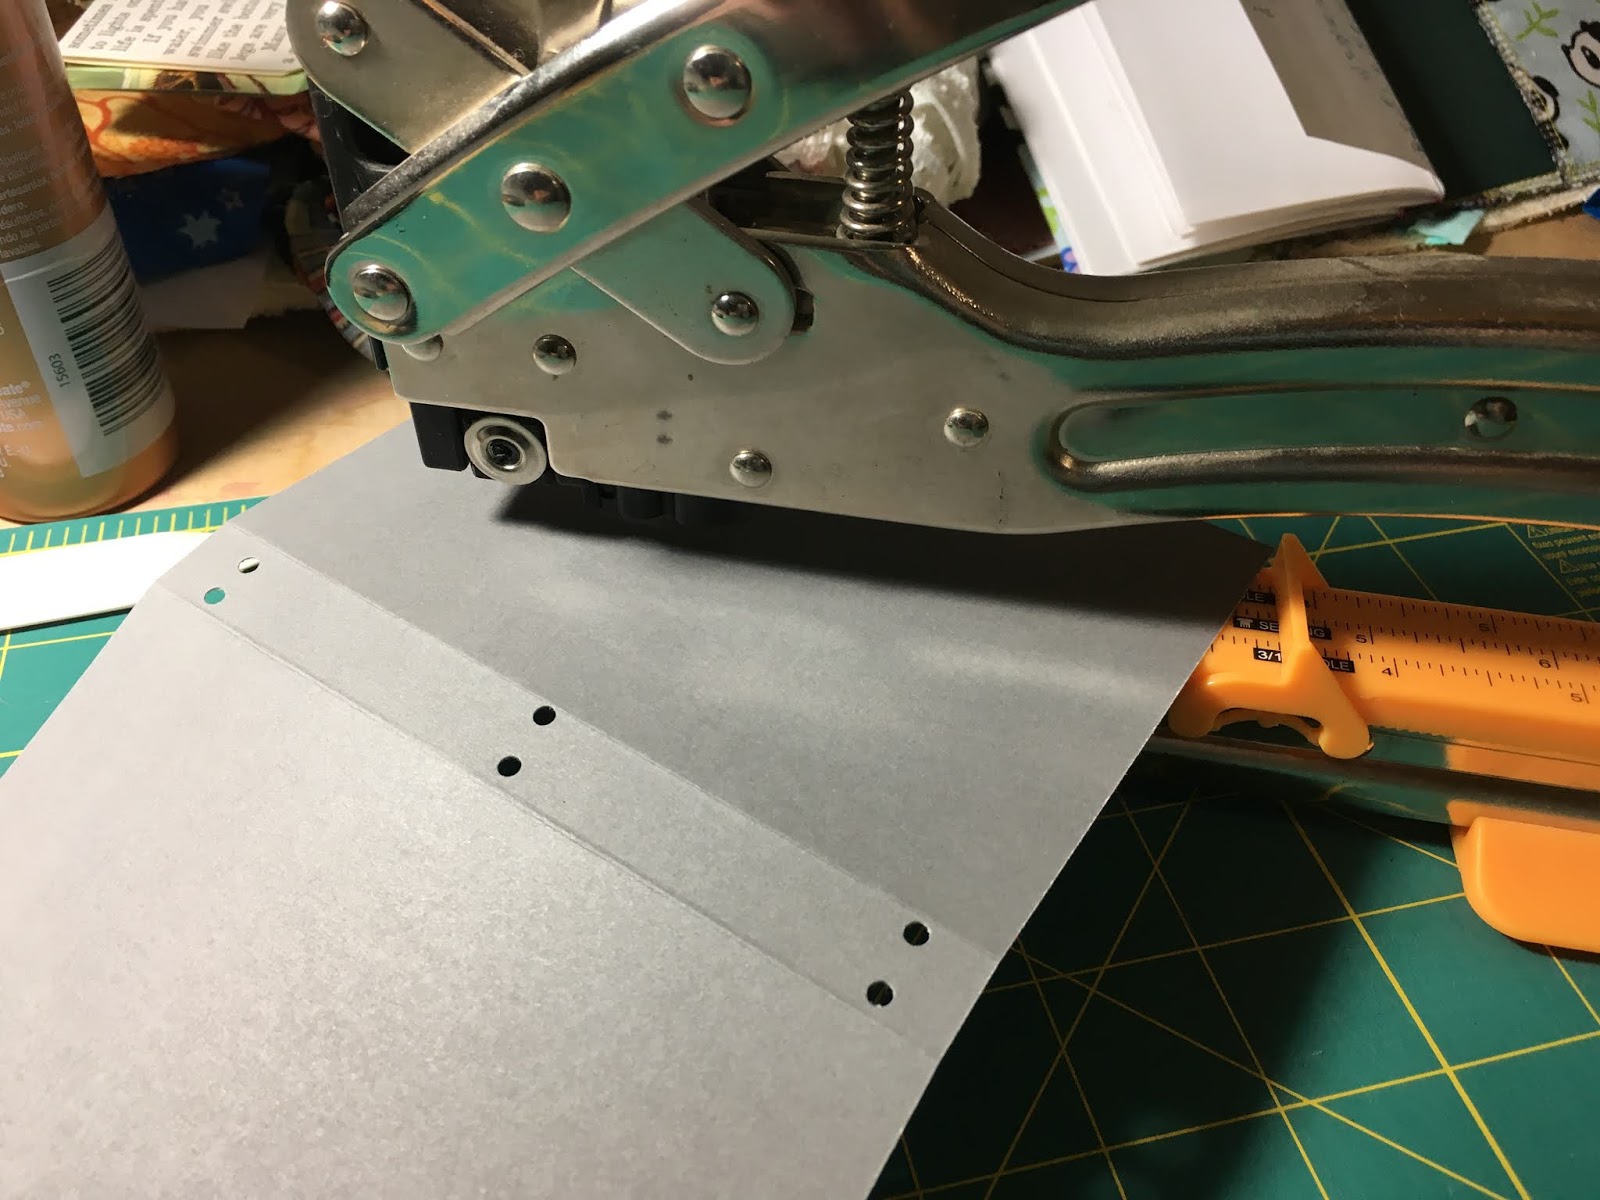
Punch holes in the cardstock for eyelets. I use my Crop-o-Dile smallest hole punch. 
The holes at the top and bottom should be about 3/8" from the edge and close to the crease. The holes in the center should be in the approximate center or wherever you want your closure band to be. 


Step 3: 
Lay your fabric out with long side (6" side) touching, Arranged with the spine fabric in the center. Serge pieces right sides together without cutting/using the serger blade. Also serge down the outer 6" sides to create a finished edge. 


Press seams toward outer edges.

Step 4:
Center cardstock on the wrong side of the fabric and fold fabric sides over to create pockets, pin in place.


Serge along the top and bottom edges close to cardstock. You will want your serger blade engaged for this. I try to serge with the outer needle touching the cardstock. It's a tricky step and I still end up with needle pricks in my cardstock, but that doesn't bother me.  Don't forget to remove your pins when serging! Go slow and hand crank for better control. 


All the serging is done now so finish off your thread tails however you like. I tie a knot and burry the thread using an upholstery needle. 


Step 6:
Snip holes in the fabric for the eyelets. Use the cardstock holes as a guide. This is another tricky bit and I haven't found the perfect technique yet. I use sharp, pointy scissors and take tiny bites until I have enough room for the eyelet.

Set the eyelets through both fabric and cardstock.


Step 7:
Add elastic cord for the notebook inserts and the closure band. Secure each with a knot.
The vertical cord is for the inserts and should be tight but not too tight (it's easier to understand by doing). 
The cord in the center should be long enough to loop around the finished journal without being loose. If you want to add a decorative button put it on the closure band before attaching to the journal. 


Step 8:
Add your inserts! My pictures were hard to follow for this step, I found that looking up a video of someone doing this was a lot easier to follow than any pictures/illustrations. 


And you're done! Thanks for reading!